





Tech Pack Template: What to Include and How to Create One
Reviewed and last updated on August 29, 2026 by admin
Creating a clothing design is one thing. Turning that design into a document a manufacturer can actually work from is another.
That is where a tech pack template becomes useful.
A tech pack template gives you a repeatable structure for documenting everything a factory needs to make a garment accurately. Instead of starting from a blank file every time you develop a T-shirt, hoodie, jacket or pair of trousers, you begin with organised sections for drawings, measurements, materials, construction, labels and revisions.
The template itself does not design the product for you. Its purpose is to make sure important production information does not get forgotten.
A well-built template can therefore save time, improve communication and make your product-development process easier to manage as your collection grows.
In simple terms, a clothing tech pack template should provide a clear place for every instruction that needs to move from your design team to the manufacturer.
Current industry guidance commonly includes technical flats, measurement specifications, a bill of materials, construction details, colourways, costing information and revision control as core components of a factory-ready tech pack.
This guide shows you what your template should contain, how to organise it and how to turn a blank structure into a useful production document.
What Is a Tech Pack Template?
A tech pack template is a reusable framework used to create technical production documents for clothing or other manufactured fashion products.
Instead of rebuilding the same tables and headings for every new design, the template already contains the main sections.
For example, your blank template might have spaces for:
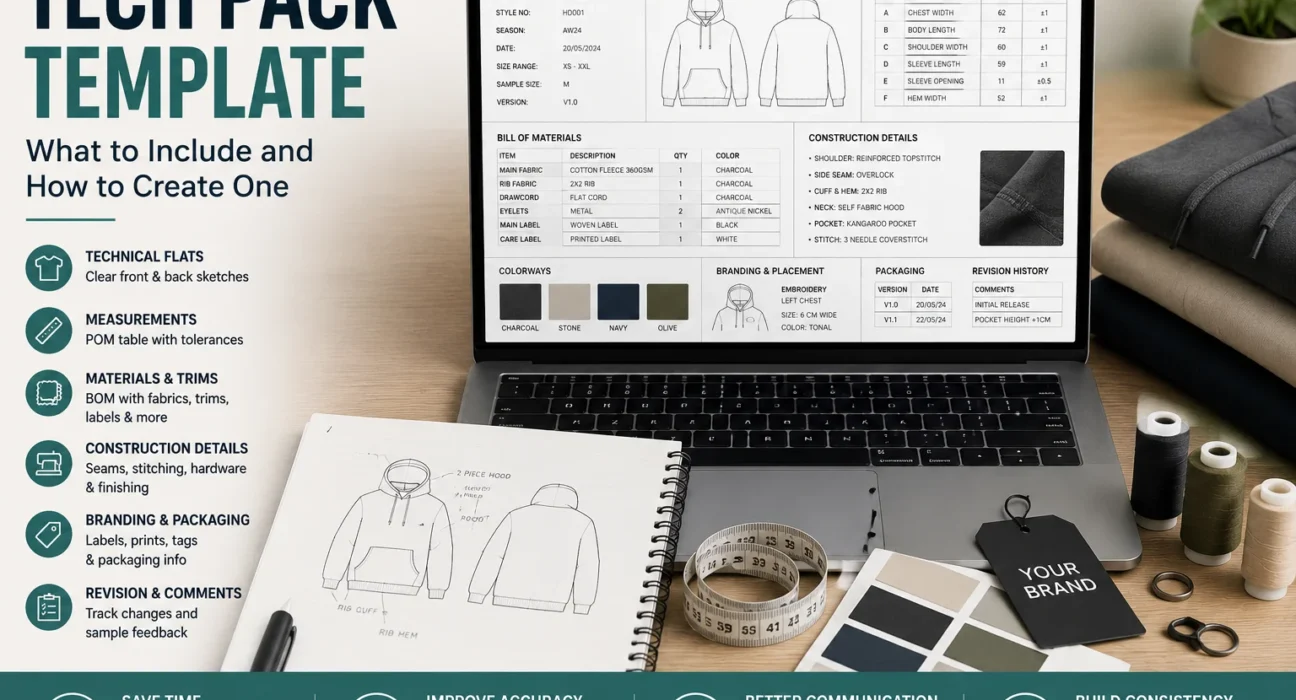
style information, technical drawings, fabric specifications, trims, measurements, tolerances, colourways, construction notes, branding, packaging and revision history.
You then duplicate the template and complete it for each individual style.
A hoodie tech pack and a T-shirt tech pack may begin from the same general framework, but the details inside them will be different.
The template is therefore the structure.
The completed tech pack is the product-specific document.
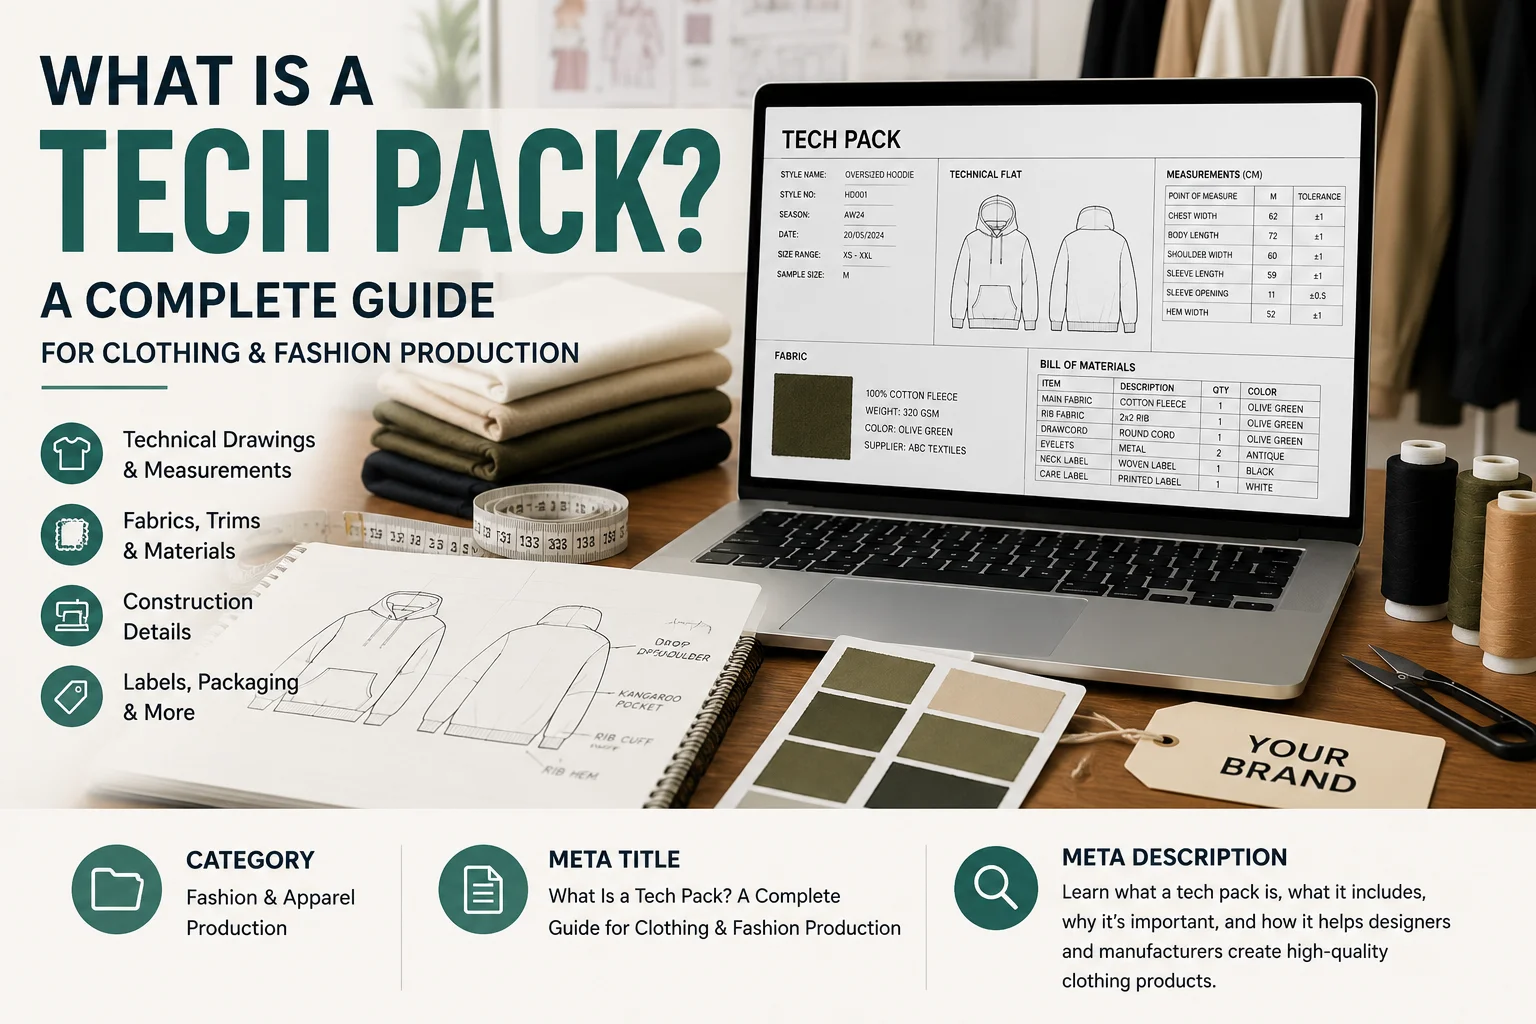
If you are completely new to garment production, first understand what a tech pack is and how it communicates product specifications between a brand and manufacturer.
What Should a Good Tech Pack Template Include?
There is no single layout that every brand must use.
A simple garment may require fewer sections than a technical jacket or performance product.
However, a useful fashion tech pack template normally includes the following major areas.
| Template Section | What It Records |
|---|---|
| Style overview | Product identity and version |
| Technical flats | Front, back and detail drawings |
| Bill of materials | Fabrics, trims, labels and components |
| Measurement specification | Points of measure and tolerances |
| Grading | Measurements across sizes |
| Construction details | Stitching, seams and finishing |
| Colourways | Approved product colour combinations |
| Artwork and branding | Prints, embroidery and label placement |
| Packaging | Folding, bags, tags and carton requirements |
| Costing | Material and production cost information |
| Fit/sample comments | Corrections after sampling |
| Revision history | Changes between versions |
Not every brand needs every section on day one.
But your master template should be flexible enough to add or remove sections as products become more complex.
Modern tech-pack systems similarly allow custom areas for fit information, QA, print specifications, stitching, costing, packaging and quantity breakdowns.
Section 1: Style Information
The first page should immediately identify the product.
This prevents confusion when a manufacturer is working on several styles at once.
A basic style-information block can contain:
Brand:
Style name:
Style number:
Product category:
Season or collection:
Sample size:
Size range:
Colourways:
Date created:
Version number:
Designer or developer:
Suppose your brand is creating an oversized hoodie.
Your completed section could look like this:
| Field | Example |
|---|---|
| Brand | North Studio |
| Style Name | Core Oversized Hoodie |
| Style Number | NS-H001 |
| Category | Hoodie |
| Sample Size | M |
| Size Range | XS–XXL |
| Colourway | Charcoal |
| Version | V1.0 |
| Date | 12 August |
The actual names are not important.
Consistency is.
If your manufacturer refers to style NS-H001, everyone involved should immediately know which product that means.
Why Style Numbers Matter
New brands sometimes assume a product name is enough.
That becomes difficult once you have:
two oversized hoodies, several colours, revised versions and multiple collections.
A style number acts like a product identifier during development.
For example:
TEE-001
HD-002
JKT-004
Your own system can be more detailed, but it should remain understandable and consistent.
The manufacturer should never have to guess whether “black hoodie final new version” and “hoodie 3 updated” are the same product.
Section 2: Technical Flat Drawings
Your tech pack template should provide dedicated space for technical flats.
These are the simplified technical drawings that show the product without artistic posing or unnecessary styling.
At minimum, most garments should have:
Front view
Back view
More complex items may also need:
side view, inside view, enlarged pocket detail, zip detail, collar construction or other callouts.
Current guidance recommends technical drawings that clearly show seams, pockets, closures, hardware and other construction details, rather than relying only on a fashion illustration.
A Useful Technical Drawing Layout
Your template might contain:
Page title: Technical Flats
Style number: HD-001
View A: Front
View B: Back
View C: Hood detail
View D: Pocket detail
Below or beside the drawings, leave room for numbered callouts.
For example:
- Two-piece hood
- Kangaroo pocket
- Ribbed cuff
- Ribbed waistband
- Double-needle topstitch
- Drawcord eyelet
The numbered system keeps the drawings cleaner while allowing detailed instructions elsewhere on the page.
Section 3: Bill of Materials Template
The Bill of Materials, or BOM, is one of the most important tables in your template.
It should identify every material or component required to manufacture the garment.
A useful blank BOM could look like this:
| Item | Description | Composition | Colour | Supplier/Code | Placement | Qty |
|---|---|---|---|---|---|---|
| Main fabric | ||||||
| Rib | ||||||
| Thread | ||||||
| Zip | ||||||
| Drawcord | ||||||
| Main label | ||||||
| Size label | ||||||
| Care label | ||||||
| Packaging |
Industry guidance commonly treats fabrics, trims, thread, hardware, labels and tags as core BOM items.
Do Not Write Vague Material Descriptions
Consider these two descriptions:
Option A: Premium cotton
Option B: 100% cotton brushed-back fleece, 360 GSM, charcoal grey
Option B gives the manufacturer much more usable information.
Terms such as “luxury”, “soft”, “premium” or “high quality” may communicate what you want emotionally, but they are not technical specifications.
If you already know the material, specify it as precisely as possible.
Section 4: Measurement Spec Sheet
The measurement specification is where your design becomes measurable.
Your clothing tech pack template should contain a table for points of measure, often called POMs.
For example:
| POM | Measurement Point | XS | S | M | L | XL | Tolerance |
|---|---|---|---|---|---|---|---|
| A | Chest width | ||||||
| B | Body length | ||||||
| C | Shoulder width | ||||||
| D | Sleeve length | ||||||
| E | Sleeve opening | ||||||
| F | Hem width |
Measurement tables should normally include a defined point of measure, base-size measurement and acceptable tolerance. Grading rules can then extend those measurements across the remaining sizes.
Do You Need a Diagram for Measurements?
Ideally, yes.
A table stating:
A – Chest width
is more useful when the manufacturer can also see a drawing showing exactly where measurement A starts and ends.
For that reason, a good fashion tech pack template should leave space for a POM diagram beside the table.
For example:
A: 2 cm below armhole
B: High point shoulder to bottom hem
C: Shoulder seam to shoulder seam
D: Shoulder seam to sleeve edge
The more precisely each measurement is defined, the less room there is for different interpretation.
Section 5: Tolerances
Tolerance should not be treated as an optional technical detail.
Manufacturing involves cutting, sewing, washing and finishing physical materials. Tiny variations can happen.
Tolerance defines how much deviation from the specification is acceptable.
For example:
Target chest: 58 cm
Tolerance: ±0.5 cm
That means a finished garment between:
57.5 cm and 58.5 cm
may fall within the agreed tolerance.
Without this field, the brand and factory may disagree about whether the finished product has passed measurement inspection.
Your measurement template should therefore include a tolerance column from the beginning.
Section 6: Grading Table
If the product will be sold in several sizes, your tech pack needs to explain how measurements change.
That process is called grading.
A simple grading table might look like this:
| Size | Chest | Length | Shoulder | Sleeve |
|---|---|---|---|---|
| XS | 52 cm | 68 cm | 47 cm | 60 cm |
| S | 55 cm | 70 cm | 49 cm | 61 cm |
| M | 58 cm | 72 cm | 51 cm | 62 cm |
| L | 61 cm | 74 cm | 53 cm | 63 cm |
| XL | 64 cm | 76 cm | 55 cm | 64 cm |
These measurements are purely illustrative.
Do not copy arbitrary example measurements into a real production document.
Your grading should be developed for the intended fit, market and garment type.
Section 7: Construction Details
One of the biggest differences between a weak and useful tech pack is the amount of construction information it provides.
A technical drawing may show a seam.
It does not necessarily explain how the seam is made.
Your template should therefore contain a dedicated construction page.
Possible fields include:
| Area | Construction Instruction |
|---|---|
| Shoulder | |
| Side seam | |
| Sleeve | |
| Neck | |
| Hem | |
| Cuff | |
| Zip |
Construction instructions may cover seam type, stitch type, stitch density, thread colour, seam allowance and finishing method.
Recent industry guidance specifically highlights vague construction instructions as a major source of sample revisions.
Instead of writing:
“Normal seam.”
you should aim for instructions precise enough that the factory does not need to decide what you meant.
Section 8: Colourway Template
If your product has more than one colour, create a dedicated colourway section.
For example:
| Component | Black | Stone | Green |
|---|---|---|---|
| Main fabric | Black | Stone | Olive |
| Rib | Black | Stone | Olive |
| Thread | Black | Tonal | Tonal |
| Drawcord | Black | Cream | Olive |
| Main logo | White | Black | Cream |
This prevents situations where the factory knows the main garment colour but does not know what colour the trims should be.
Where colour accuracy matters, include recognised colour references, supplier colour codes or approved swatches.
Section 9: Artwork and Print Placement
If your garment includes graphics, logos or embroidery, add a separate artwork section.
A good template can include:
Artwork name:
Technique:
Position:
Width:
Height:
Colour reference:
Artwork file name:
Special instructions:
Suppose you are adding an embroidered chest logo.
Writing:
“Small logo on left chest”
is too open to interpretation.
Instead, specify:
logo width, exact placement from centre front or side seam, distance from shoulder or neckline, thread colours and embroidery method.
Your technical flat can also show the artwork position visually.
Section 10: Labels
Branding details deserve their own space.
A useful labels table could contain:
| Label | Type | Material | Size | Placement | Supplier |
|---|---|---|---|---|---|
| Main label | |||||
| Size label | |||||
| Care label | |||||
| Composition label |
Labels are small components but can still create production mistakes when their position or orientation is unclear.
Your template should therefore record both the label specification and exactly where it should be attached.
Section 11: Packaging Instructions
Packaging is often forgotten because designers naturally concentrate on the garment itself.
But factories still need to know how finished products should leave production.
Packaging instructions can cover:
folding method, tissue paper, individual polybag, hangers, barcode stickers, swing tags, size stickers, carton quantity and carton markings.
Current tech-pack platforms also treat packaging details as a legitimate custom production section.
A blank packaging section might contain:
Fold method:
Individual bag:
Bag dimensions:
Barcode position:
Swing-tag placement:
Units per carton:
Carton marking:
Special requirements:
Section 12: Costing Sheet
Not every factory-facing tech pack includes full internal costing information.
However, having a costing section within your master template can be useful.
A basic costing table could include:
| Cost Item | Unit Cost |
|---|---|
| Main fabric | |
| Rib | |
| Trims | |
| Labels | |
| Printing/embroidery | |
| Cut and make | |
| Packaging | |
| Other | |
| Total estimated cost |
Current tech-pack guidance commonly includes a costing sheet or cost data as part of broader product-development documentation.
Whether you share all of this information with a manufacturer depends on how your sourcing process works.
Your internal template can contain more information than the version you ultimately export to a factory.
Section 13: Sample and Fit Comments
Your tech pack should not stop being useful after the first sample arrives.
The same document can help control revisions.
A fit-comments page can contain:
Sample round:
Date received:
Reviewed by:
Overall status:
Measurement comments:
Construction comments:
Fabric comments:
Artwork comments:
Required action:
You can also photograph the sample and annotate areas needing correction.
For example:
Sleeve +2 cm
Pocket move up 1 cm
Neck opening reduce 0.5 cm
Change rib to heavier quality
This is much clearer than sending disconnected comments across several messages.
Section 14: Revision History
Every professional tech pack template should contain some form of version history.
A simple revision table can look like this:
| Version | Date | Change | Approved By |
|---|---|---|---|
| V1.0 | Initial issue | ||
| V1.1 | |||
| V1.2 | |||
| V2.0 |
Revision control matters because manufacturing rarely happens from the very first specification.
Measurements change.
Materials change.
Suppliers suggest alternatives.
Artwork moves.
Fit corrections are approved.
Current tech-pack guidance recommends keeping those updates in one controlled document so that manufacturers are less likely to produce from an outdated version.
A Simple Tech Pack Template Structure You Can Copy
If you are creating your first template, you do not need to overcomplicate it.
A practical document structure could be:
Page 1 – Cover Sheet
Brand
Style name
Style number
Product category
Season
Date
Version
Sample size
Colourway
Page 2 – Technical Flats
Front view
Back view
Detail views
Numbered construction callouts
Page 3 – Bill of Materials
Main fabric
Secondary fabric
Thread
Trims
Hardware
Labels
Packaging
Page 4 – Measurements
POM codes
Measurement descriptions
Base size
Tolerance
Grading
Page 5 – Construction
Seam specifications
Stitching
Hem
Neckline
Pocket
Closures
Finishing
Page 6 – Colour and Artwork
Colourways
Logo placement
Print measurements
Embroidery
Colour references
Page 7 – Labels and Packaging
Main label
Care label
Size label
Swing tag
Bagging
Folding
Carton requirements
Page 8 – Sample Comments and Revisions
Fit feedback
Changes required
Approval status
Version history
That is enough to create a strong foundation for many straightforward apparel products.
Tech Pack Template Example for a Hoodie
To see how this works in practice, imagine we are developing an oversized fleece hoodie.
Style Overview
Style: Essential Oversized Hoodie
Style No: EH-001
Sample Size: M
Range: XS–XXL
Version: V1.0
Main Fabric
100% cotton brushed fleece
360 GSM
Charcoal
Rib
Cotton/elastane rib
2×2 construction
Charcoal tonal match
Garment Features
Two-piece hood
Kangaroo pocket
Ribbed cuff
Ribbed hem
Metal eyelets
Flat cotton drawcord
Sample Measurement Table
| POM | Measurement | M | Tolerance |
|---|---|---|---|
| A | Chest width | 62 cm | ±0.5 cm |
| B | Body length | 72 cm | ±0.7 cm |
| C | Shoulder | 60 cm | ±0.5 cm |
| D | Sleeve | 59 cm | ±0.5 cm |
| E | Bottom opening | 54 cm | ±0.7 cm |
These numbers are only included to demonstrate what a completed table looks like.
A real garment should use measurements developed specifically for the required fit and pattern.
Branding
Woven main label at centre-back neck.
Care label inserted into inside left seam.
Small embroidered logo on left chest.
Packaging
Garment folded.
One unit per recyclable bag.
Size sticker on lower-right corner.
That is already far more useful to a manufacturer than an email saying:
“Please make me a premium oversized charcoal hoodie.”
Should You Use the Same Template for Every Garment?
Use the same framework, but not necessarily the same exact fields.
For example, a T-shirt does not need a zip specification page.
A jacket might.
A pair of trousers may need detailed information about:
waistband construction, fly, pockets, belt loops and internal finishing.
A sports garment may need additional areas for:
stretch, performance fabric, bonding, ventilation and reflective components.
Current tech-pack guidance recommends category-specific templates because different product types require different technical information.
Your master template should therefore be modular.
Keep the core sections and add specialised pages when the product requires them.
Excel, Illustrator or Dedicated Tech Pack Software?
A tech pack template can be created in several ways.
Some brands use spreadsheets for BOMs, measurements and costing.
Vector design software is commonly used for technical drawings.
Other teams use dedicated product-development or tech-pack platforms that combine sketches, materials, measurements, comments and version control.
The right solution depends on the size and complexity of your operation.
For someone developing only a few products, a well-organised combination of vector drawings and spreadsheets can work.
As the collection grows, version control becomes harder.
Industry guidance increasingly emphasises this problem: managing multiple styles, suppliers and revisions across disconnected files can create inconsistent versions.
Whatever tool you choose, the important principles remain the same:
the information must be accurate, organised and easy for the manufacturer to interpret.
How to Create a Tech Pack Template From Scratch
Start by creating the skeleton before entering product data.
Build your standard page order.
Then create reusable tables for:
style information, BOM, measurements, grading, labels, costing and revision history.
Next, create fixed areas where technical flats and POM diagrams will be inserted.
Add fields for version numbers and dates on every major page or in a consistent header.
Once the structure is complete, duplicate the blank document and test it using one real garment.
This testing stage is important.
You may realise that your first template has nowhere to record:
zip specifications, packaging information or artwork placement.
Add those missing areas to the master template before developing the next product.
Over time, your template becomes better because it reflects the questions your manufacturers actually ask.
Run a Consistency Check Before Sending It
A tech pack can contain plenty of information and still be confusing if its sections contradict each other.
Before sending it to a manufacturer, check whether:
the BOM fabric matches the fabric named in your construction notes;
the colourway page matches the artwork colours;
every measurement listed in the POM table appears on the measurement diagram;
every trim shown in the technical flat appears in the BOM;
the size range is consistent throughout the document;
and the version number clearly identifies the current file.
Current guidance specifically recommends performing this type of internal consistency review before handing a tech pack to a factory.
A contradiction can be worse than a missing field because the factory has no way of knowing which instruction should take priority.
What Should You Remove From a Tech Pack Template?
More information is not automatically better.
Avoid filling the document with information that does not help the manufacturer produce the product.
A mood board may be useful during concept development, but it should not replace technical specifications.
Long paragraphs about brand inspiration do not compensate for missing measurements.
Decorative graphics that make tables difficult to read can also reduce usability.
The goal is not to create the prettiest PDF.
The goal is to create the clearest manufacturing document.
Common Tech Pack Template Mistakes
One common mistake is downloading a generic template and assuming that simply filling every box makes the tech pack production-ready.
A template cannot tell you whether your measurements are correct.
It cannot decide the right fabric.
It cannot automatically know how a seam should be constructed.
The template organises technical knowledge; it does not replace it.
Another mistake is using one template without adapting it to the product.
A simple jersey T-shirt and a waterproof technical jacket do not need the same level of information.
Brands also frequently forget revision control.
A document labelled:
FINAL.pdf
can quickly become:
FINAL-2.pdf
then:
FINAL-NEW.pdf
then:
FINAL-NEW-ACTUAL.pdf
That approach becomes dangerous once files are being exchanged with manufacturers.
A controlled version number such as:
V1.0, V1.1, V1.2, V2.0
is much easier to track.
Is a Free Tech Pack Template Enough?
It can be a good starting point.
A free tech pack template can help you understand how professional production information is organised.
But the quality of the final document depends entirely on what you put into it.
An empty measurement table is useful only after someone enters accurate measurements.
A BOM is useful only when the materials are correctly specified.
A construction page is useful only when the instructions reflect how the garment should actually be manufactured.
For straightforward products, a strong template and good technical understanding may be enough.
For complicated garments, you may still need assistance from a technical designer, garment technologist or pattern specialist.
Tech Pack Template vs Tech Pack Example
These two terms describe different things.
A tech pack template is blank or partly preformatted.
It is designed to be reused.
A tech pack example shows what that template looks like after it has been completed for a particular product.
Looking at examples is useful because it demonstrates how much detail should go into each field.
Using a template is useful because it gives you somewhere to put your own information.
Ideally, someone learning product development should study examples first, then develop a template suited to their own workflow.
Does a Manufacturer Provide the Tech Pack Template?
Sometimes a manufacturer may provide preferred specification sheets or information requirements.
But brands should avoid depending entirely on factory-specific templates.
Your tech pack represents your own product specification.
If you switch manufacturers, you should still have a complete record of what the product is supposed to be.
Maintaining your own master documentation gives you much stronger control over product development.
The factory can then request additional information where necessary.
When Should You Update Your Template?
There are two different things to update:
the product tech pack
and
the master template.
The product tech pack should be updated whenever the garment specification changes.
The master template should be updated whenever you discover a recurring information gap in your workflow.
For example, if three manufacturers repeatedly ask you for carton dimensions, add a carton-dimensions field to your standard packaging section.
If print suppliers repeatedly request artwork colour references, make that field compulsory in future templates.
Your template should become more useful as your production experience grows.
Frequently Asked Questions
What is a tech pack template?
A tech pack template is a reusable document structure used to organise manufacturing information such as technical drawings, measurements, fabrics, trims, construction details and revisions.
What should be included in a clothing tech pack template?
A strong clothing tech pack template normally includes style information, technical flats, a bill of materials, measurements, tolerances, grading, construction notes, colourways, branding, labels, packaging and revision history.
Can I make my own tech pack template?
Yes. You can build one using spreadsheets, vector-design software or specialist tech-pack platforms. The important requirement is that the finished document clearly communicates the product specifications.
Can I use Excel for a tech pack template?
Yes. Spreadsheets are particularly useful for measurements, BOMs, grading and costing. Technical drawings may still need to be created in a design or drawing application.
Do I need Illustrator to create a tech pack?
No. Illustrator is widely used for technical flats, but it is not mandatory. What matters is that the technical drawings and specification information are clear and accurate.
Is a tech pack template the same as a spec sheet?
No. A spec sheet typically concentrates on measurements, while a full tech pack contains broader production information. The measurement specification sheet can be one part of your tech pack template.
Does a tech pack template include a BOM?
It should. The Bill of Materials records the fabrics, trims, hardware, labels and other components required to make the product.
Should a tech pack include packaging details?
For production-ready documentation, packaging requirements can be valuable. This may include folding instructions, individual bags, labels, swing tags, barcode placement and carton requirements.
Should every product have its own tech pack?
Yes. Each individual style should normally have its own product-specific tech pack, even when several products are created from the same master template.
Final Thoughts
A tech pack template is valuable because it turns product-development knowledge into a repeatable system.
Instead of remembering from scratch that every new garment needs measurements, materials, labels, construction notes and revision tracking, the template reminds you where each piece of information belongs.
The most useful fashion tech pack template is not necessarily the one with the most pages.
It is the one that gives your manufacturer the information required to understand the product without having to make unnecessary assumptions.
For a small clothing brand, that might begin with eight straightforward sections covering style information, drawings, materials, measurements, construction, branding, packaging and revisions.
As the business develops, the template can become more sophisticated.
The important point is to treat it as a working production system rather than a decorative document.
A strong clothing tech pack template gives you structure. Accurate product specifications give that structure value. When both are combined, you have a much better foundation for moving from design concept to sampling and eventually consistent manufacturing.